Butterbeer cheesecake
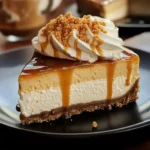
If you’re looking for a dessert that feels like a warm hug, you’ve come to the right place with this Butterbeer cheesecake! This recipe is not just a treat; it’s an experience, transporting you to a world filled with the comforting flavors of butterscotch and cream soda. Whether you’re celebrating a special occasion or simply indulging on a cozy night in, this cheesecake is sure to impress family and friends alike.
One of the things I love most about this Butterbeer cheesecake is how easy it is to prepare. You can whip it up in no time and let it chill while you focus on other things. It’s perfect for family gatherings, dinner parties, or just a sweet escape after a long day. Trust me, once you try it, you’ll want to make it for every occasion!
Why You’ll Love This Recipe
- Easy to Make: This Butterbeer cheesecake comes together quickly, so you don’t have to spend hours in the kitchen.
- Family-Friendly: The delightful flavors are sure to please both kids and adults, making it a hit at any gathering.
- Make-Ahead Convenience: You can prepare this dessert a day in advance, giving you more time to enjoy your company.
- Decadent Flavor: The combination of butterscotch and cream soda creates a rich and creamy experience that everyone will adore.
Ingredients You’ll Need
Creating this Butterbeer cheesecake is simple with these wholesome ingredients. You might even find that you already have many of them in your pantry! Let’s gather what we need:
For the Crust
- 2 cups graham cracker crumbs
- 1/4 cup granulated sugar
- 1/2 cup unsalted butter, melted
For the Cheesecake Filling
- 4 (8 oz.) packages cream cheese, softened
- 1/2 cup sour cream
- 3 large eggs
- 2 cups granulated sugar
- 1/2 tablespoon vanilla extract
- 1/2 tablespoon butter flavoring
- 1/2 cup butterscotch sauce
- 1/4 cup cream soda
- 1/2 cup butterscotch chips
For Topping
- 8 oz. tub of cool whip
Variations
This Butterbeer cheesecake recipe is wonderfully flexible! Here are some ideas to mix things up:
- Add Nuts: Sprinkle some crushed pecans or walnuts into the crust for an extra crunch.
- Different Toppings: Swap out cool whip for whipped coconut cream for a dairy-free option.
- Flavor Twist: Experiment with adding a pinch of cinnamon or nutmeg for warm spice notes.
- Chocolate Drizzle: Drizzle some melted chocolate over the top before serving for added richness.
How to Make Butterbeer cheesecake
Step 1: Prepare Your Oven and Pan
Preheat your oven to 325°F (160°C). This step ensures that your cheesecake bakes evenly and helps achieve that perfect creamy texture we all love. While that’s heating up, grab an 8-inch springform pan—this is where all the magic happens!
Step 2: Make the Crust
In a mixing bowl, combine your graham cracker crumbs, 1/4 cup of sugar, and melted butter until everything is well mixed. Press this mixture evenly into the bottom of your springform pan. This crust forms the delightful base of our Butterbeer cheesecake and adds that necessary crunch!
Step 3: Beat the Cream Cheese Mixture
In another large mixing bowl, beat your softened cream cheese until it’s smooth using an electric mixer. This step is crucial as it creates the fluffy texture we desire in our cheesecake. Once smooth, add in your sour cream and continue mixing until well combined.
Step 4: Incorporate Sugar
Gradually add in 2 cups of granulated sugar while beating. Make sure everything is fully incorporated—this will sweeten our filling perfectly without any gritty texture.
Step 5: Add Eggs One by One
Beat in your eggs one at a time. Mixing each egg thoroughly before adding the next helps create that lovely creamy filling without any lumps.
Step 6: Mix in Flavorings
Stir in the vanilla extract and butter flavoring until everything is smooth and creamy. These flavorings are key as they bring out those delicious butterscotch notes!
Step 7: Blend Butterscotch Goodness
Finally, add in your butterscotch sauce, cream soda, and butterscotch chips. Stir until everything is well blended—a little taste test here won’t hurt either!
Step 8: Assemble and Bake
Pour your creamy cheesecake mixture over the prepared crust in your springform pan. Smooth out the top with a spatula—it helps with even baking! Place the pan in your preheated oven with a pan of water below (this keeps moisture during baking) and bake for about 60 minutes.
Step 9: Cool Down Gradually
Once baked, turn off your oven but leave the cheesecake inside with the door slightly ajar for about an hour. This gradual cooling process prevents cracks on top—nobody wants cracks on their beautiful cheesecake!
Step 10: Chill Before Serving
Remove from the oven and refrigerate for at least four hours—or overnight if you can wait! This chilling time allows all those flavors to meld beautifully.
Step 11: Serve with Cool Whip
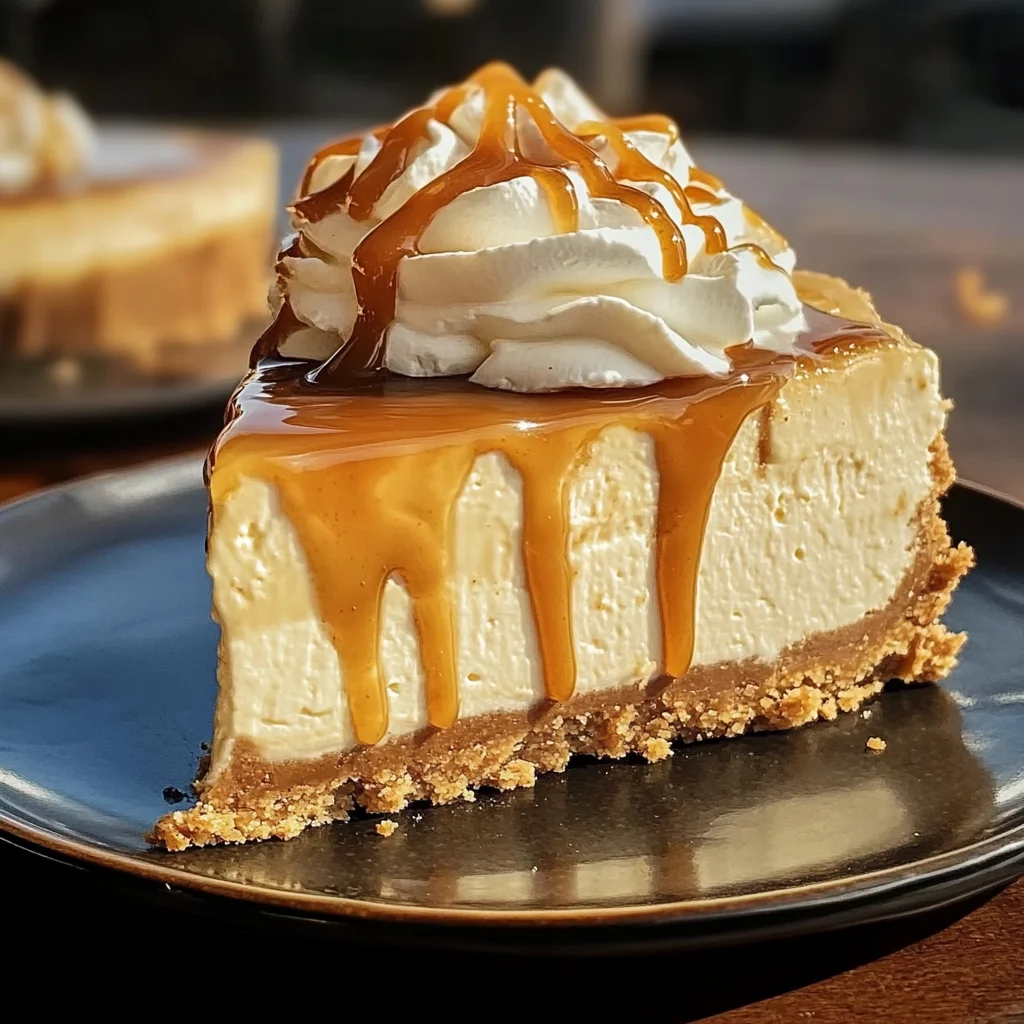
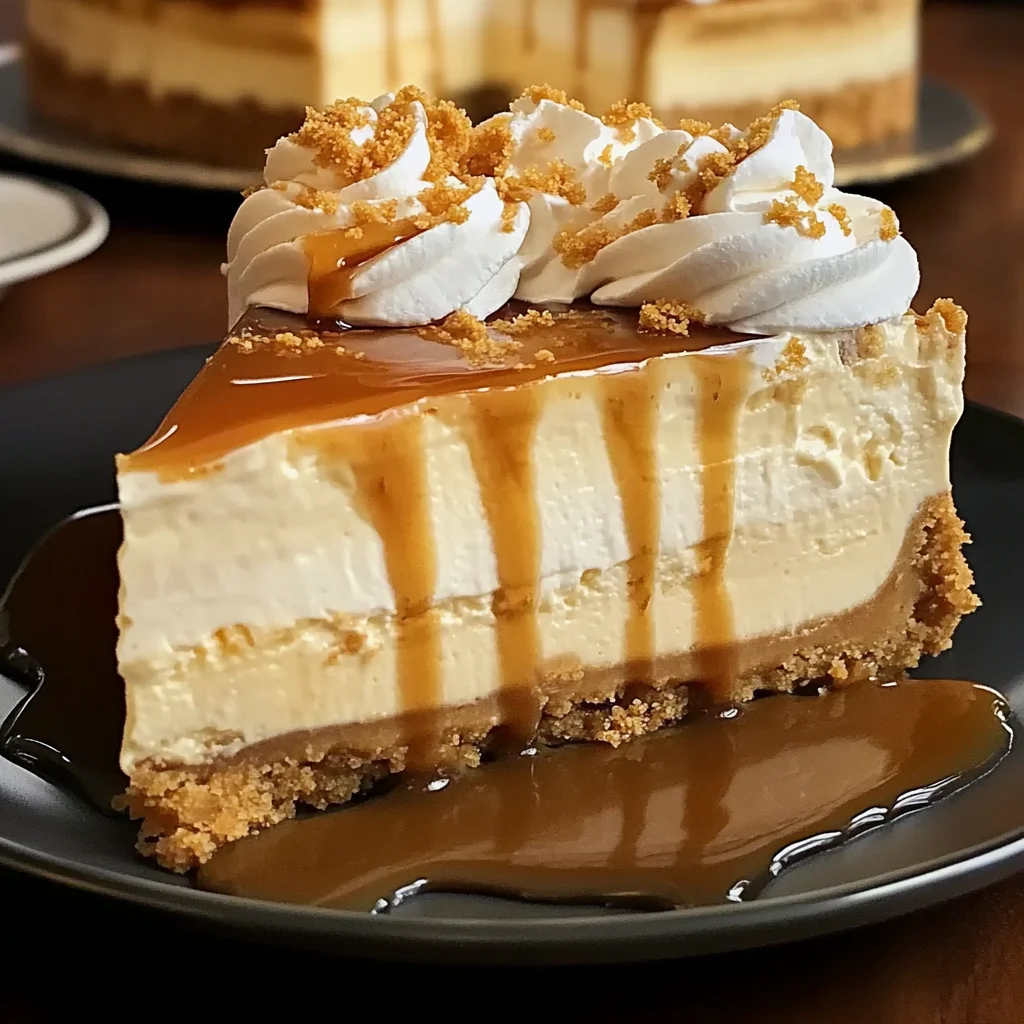
When you’re ready to serve, top with cool whip! Pipe swirls around the edge and fill up the center with more cool whip if you’re feeling indulgent. A drizzle of butterscotch sauce on top makes it look as good as it tastes!
Enjoy every magical bite of this Butterbeer cheesecake!
Pro Tips for Making Butterbeer Cheesecake
Making a heavenly Butterbeer cheesecake is all about those little details that elevate your dessert game. Here are some pro tips to ensure your cheesecake turns out perfectly every time!
- Use room temperature ingredients: Bringing your cream cheese, eggs, and sour cream to room temperature helps create a smoother batter, resulting in a creamier cheesecake.
- Don’t overmix: While it’s important to combine the ingredients well, overmixing can incorporate too much air into the batter, leading to cracks during baking. Mix just until combined.
- Water bath method: Using a water bath while baking ensures even cooking and prevents the edges from setting too quickly. This creates a creamy texture throughout the cheesecake.
- Chill overnight: Allowing the cheesecake to chill overnight is essential for flavors to meld together and for the perfect consistency. Patience is key here!
- Experiment with toppings: Don’t hesitate to get creative with your toppings! Additional butterscotch sauce or even crushed graham crackers can add an extra layer of flavor and texture.
How to Serve Butterbeer Cheesecake
Serving your Butterbeer cheesecake is an opportunity to impress your guests with its delightful presentation. Here are some ideas on how to make it look as good as it tastes!
Garnishes
- Butterscotch drizzle: A generous drizzle of butterscotch sauce over the top adds sweetness and makes for an eye-catching finish.
- Whipped cream swirls: Lightly piped whipped cream around the edges not only looks elegant but also enhances the creaminess of each slice.
- Graham cracker crumbs: Sprinkling some crushed graham crackers on top gives a nice crunch and ties in with the crust flavor.
Side Dishes
- Fresh fruit salad: A light and refreshing fruit salad complements the rich cheesecake beautifully, balancing out the flavors.
- Vanilla ice cream: A scoop of vanilla ice cream provides a classic pairing that melts deliciously into each bite of cheesecake.
- Chocolate mousse: For those who love chocolate, serving a small portion of chocolate mousse alongside offers a decadent contrast to the caramel notes of the cheesecake.
- Coffee or tea: A warm cup of coffee or herbal tea can enhance the experience, providing a comforting finish after indulging in this sweet treat.
With these tips and serving suggestions, you’re all set to bring a little magic into your kitchen with this enchanting Butterbeer cheesecake! Enjoy every delicious bite!
Make Ahead and Storage
This Butterbeer cheesecake is perfect for meal prep, allowing you to indulge in this delightful dessert whenever the craving strikes. Preparing it ahead of time not only saves you effort but also enhances the flavors as it sets in the fridge.
Storing Leftovers
- Store leftover cheesecake in an airtight container in the refrigerator.
- It will stay fresh for up to 5 days.
- You can also cover the cheesecake directly with plastic wrap if you prefer.
Freezing
- To freeze, wrap the cheesecake tightly in plastic wrap and then in aluminum foil to prevent freezer burn.
- It can be frozen for up to 2 months.
- Thaw overnight in the refrigerator before serving.
Reheating
- If you prefer your cheesecake slightly warm, place individual slices on a microwave-safe plate.
- Heat in short increments of about 10-15 seconds until just warmed through.
- Avoid overheating, as this may affect its creamy texture.
FAQs
Here are some common questions about our Butterbeer cheesecake!
Can I make Butterbeer cheesecake without cream cheese?
While cream cheese is essential for that rich and creamy texture, you might experiment with vegan cream cheese alternatives for a different take.
How do I make Butterbeer cheesecake?
To make Butterbeer cheesecake, follow the provided recipe steps closely to achieve that perfect blend of butterscotch and cream soda flavors. Enjoy each bite!
How long does Butterbeer cheesecake last?
Properly stored, your Butterbeer cheesecake will last up to 5 days in the refrigerator. For longer storage, consider freezing it!
What can I use instead of butterscotch sauce?
If you don’t have butterscotch sauce on hand, try caramel sauce or a homemade version using brown sugar and butter for a similar flavor profile.
Final Thoughts
I hope this enchanting Butterbeer cheesecake finds a special place on your dessert table! With its magical blend of flavors, it’s sure to impress family and friends alike. Have fun making it, and don’t forget to let me know how it turns out—I can’t wait for you to enjoy every delicious bite! Happy baking!
Butterbeer Cheesecake
Indulge in a slice of creamy Butterbeer cheesecake, a delightful dessert that brings the comforting flavors of butterscotch and cream soda to your table. Perfect for family gatherings or cozy nights in, this cheesecake is sure to impress with its rich texture and sweet aroma. With easy preparation and make-ahead convenience, you can whip up this magical treat in no time, allowing you to focus on what truly matters—enjoying it with friends and loved ones. Each bite is a taste of nostalgia that will have everyone asking for seconds!
- Prep Time: 30 minutes
- Cook Time: 60 minutes
- Total Time: 1 hour 30 minutes
- Yield: Serves approximately 12 slices 1x
- Category: Dessert
- Method: Baking
- Cuisine: American
Ingredients
- 2 cups graham cracker crumbs
- 1/4 cup granulated sugar
- 1/2 cup unsalted butter, melted
- 4 (8 oz.) packages cream cheese, softened
- 1/2 cup sour cream
- 3 large eggs
- 2 cups granulated sugar
- 1/2 tablespoon vanilla extract
- 1/2 tablespoon butter flavoring
- 1/2 cup butterscotch sauce
- 1/4 cup fruit soda
- 1/2 cup butterscotch chips
- 8 oz. tub of cool whip
Instructions
- Preheat oven to 325°F (160°C) and prepare an 8-inch springform pan.
- Combine graham cracker crumbs, sugar, and melted butter; press into the bottom of the pan.
- Beat cream cheese until smooth; add sour cream and mix well.
- Gradually incorporate sugar; then beat in eggs one at a time until fully combined.
- Mix in vanilla extract, butter flavoring, butterscotch sauce, fruit soda, and butterscotch chips.
- Pour mixture over crust and bake for about 60 minutes.
- Turn off the oven and let cool inside with the door ajar for an hour before refrigerating for at least four hours or overnight.
- Top with cool whip before serving.
Nutrition
- Serving Size: 1 slice (approximately 100g)
- Calories: 390
- Sugar: 28g
- Sodium: 320mg
- Fat: 27g
- Saturated Fat: 16g
- Unsaturated Fat: 10g
- Trans Fat: 0g
- Carbohydrates: 36g
- Fiber: 1g
- Protein: 6g
- Cholesterol: 85mg

