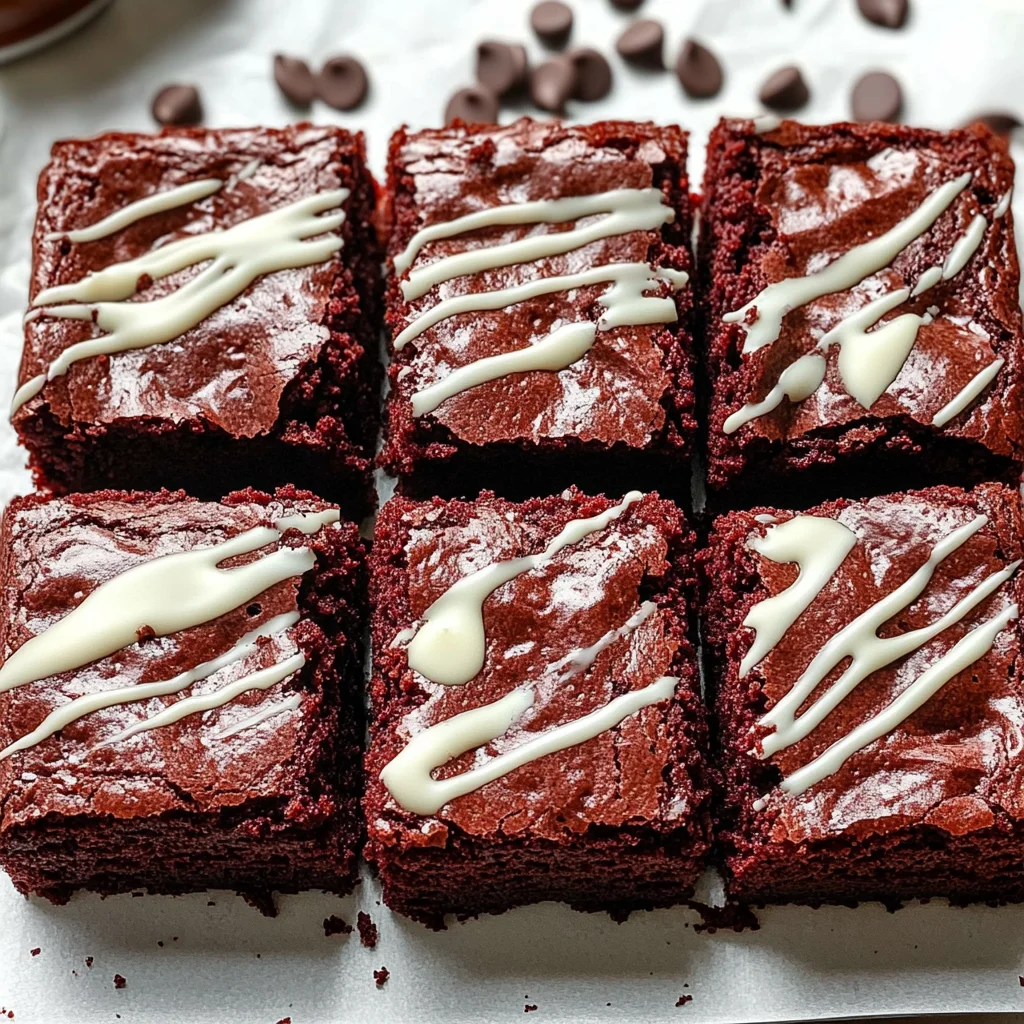
Red Velvet Brownies
If you’re looking for a deliciously unique dessert to impress your family or friends, these Red Velvet Brownies are just the ticket! They combine the rich, chocolatey goodness of brownies with that classic red velvet flavor we all love. What makes this treat even more special is how easy it is to whip up. Whether it’s a busy weeknight or a family gathering, these fudgy brownies will surely satisfy anyone’s sweet tooth!
These brownies are not only delightful but also versatile. You can serve them warm with a scoop of vanilla ice cream or drizzle some melted white chocolate on top for an extra touch of sweetness. They are perfect for any occasion, making them a new favorite in your dessert rotation.
Why You’ll Love This Recipe
- Easy to make: With just a few simple steps, you can create these decadent brownies in no time!
- Fudgy texture: These brownies are incredibly moist and chewy, making each bite utterly satisfying.
- Family-friendly: Kids and adults alike will adore the vibrant color and luscious taste—perfect for sharing!
- Make-ahead option: Bake them in advance and store them for later. They stay fresh and delicious for days!
- Customizable: Feel free to add your favorite mix-ins or toppings to make them uniquely yours.

Ingredients You’ll Need
Let’s gather our ingredients! This recipe calls for simple, wholesome items that you probably already have in your pantry. Each ingredient plays an important role in creating the best fudgy Red Velvet Brownies.
For the Brownies
- 3/4 cup unsalted butter (melted)
- 2 oz chopped semi-sweet chocolate bar
- 1 & 1/4 cup granulated sugar
- 2 large eggs
- 2 teaspoon vanilla extract
- 1 teaspoon white vinegar
- 1/2 tablespoons red gel food coloring
- 2 tablespoons unsweetened cocoa powder
- 1 & 1/4 cup all-purpose flour
- 1/4 teaspoon salt
- 1/2 cup white chocolate chips (optional mixed into the batter or melted and drizzled on top)
Variations
This Red Velvet Brownies recipe is wonderfully flexible! Here are some fun ideas to customize your treat:
- Add nuts: Toss in some chopped walnuts or pecans for crunch.
- Use dark chocolate: Substitute semi-sweet chocolate with dark chocolate for a richer flavor.
- Swirl cream cheese: Create a cream cheese swirl by mixing softened cream cheese with sugar and adding it before baking.
- Make it gluten-free: Swap out regular flour with a gluten-free blend to cater to dietary needs.
How to Make Red Velvet Brownies
Step 1: Preheat the Oven
Preheat your oven to 350°F (175°C). This step is crucial as it ensures that your brownies bake evenly. While the oven heats up, line an 8×8 inch baking pan with parchment paper so that your delicious treats don’t stick!
Step 2: Melt the Butter and Chocolate
In a large microwave-safe mixing bowl, melt the butter and chopped chocolate together in the microwave. Do this in 30-second increments, stirring until fully melted. This method helps create a rich base for your brownies.
Step 3: Combine the Wet Ingredients
Once your mixture has cooled slightly, add the granulated sugar and mix until well combined. Then, add in the eggs one at a time, beating well after each addition. Stir in vanilla extract, white vinegar, and red food coloring until everything is beautifully blended.
Step 4: Mix Dry Ingredients
In another bowl, sift together cocoa powder, flour, and salt. Sifting helps aerate the dry ingredients and prevents clumps from forming. This ensures an even texture throughout your brownies.
Step 5: Combine Wet and Dry Mixtures
Gradually add the dry ingredients to your wet mixture. Stir gently until just combined; overmixing can lead to dense brownies. If you want an extra indulgent treat, fold in those optional white chocolate chips now!
Step 6: Bake Your Brownies
Pour the batter into your prepared baking pan and spread it out evenly. Bake in the preheated oven for approximately 30-35 minutes. Keep an eye on them; they’re done when a toothpick inserted into the center comes out with a few moist crumbs—just perfect!
Step 7: Cool and Serve
Allow your delicious Red Velvet Brownies to cool completely in the pan before cutting them into squares. For an extra special touch, consider drizzling melted white chocolate on top once they’ve cooled down!
Now you’re ready to enjoy these delightful treats! Share them with family or keep them all to yourself—no judgment here!
Pro Tips for Making Red Velvet Brownies
Making the perfect red velvet brownies can be a delightful experience if you keep a few helpful tips in mind!
- Use quality chocolate – Opt for a good quality semi-sweet chocolate bar to enhance the richness of your brownies. The better the chocolate, the more decadent your brownies will taste.
- Don’t overmix – When combining the dry and wet ingredients, mix just until combined. Overmixing can lead to tough brownies, so gentle folding is key to keeping them fudgy.
- Check for doneness – Keep an eye on the baking time and do the toothpick test! A few moist crumbs should stick to the toothpick—this means your brownies are perfectly baked and not dry.
- Let them cool completely – Patience is crucial! Allowing your brownies to cool completely in the pan helps achieve clean cuts and enhances their fudgy texture.
- Experiment with toppings – Feel free to get creative with toppings! Adding nuts, sprinkles, or even a dusting of powdered sugar can elevate your brownies and make them visually stunning.
How to Serve Red Velvet Brownies
Serving red velvet brownies is all about making them look as delicious as they taste. Here are some fun ideas for presentation!
Garnishes
- Powdered sugar dusting – A light sprinkle of powdered sugar adds a beautiful contrast against the deep red color, giving a touch of elegance.
- Fresh berries – Topping with raspberries or strawberries not only adds color but also offers a refreshing tartness that complements the sweetness of the brownies.
Side Dishes
- Vanilla ice cream – A scoop of vanilla ice cream pairs wonderfully with warm brownies, creating a delightful contrast between temperatures and flavors.
- Whipped coconut cream – For a dairy-free option, whipped coconut cream adds a fluffy texture and subtle sweetness that complements the rich chocolate flavor.
- Chocolate sauce drizzle – A drizzle of chocolate sauce can intensify the brownie experience—perfect for true chocolate lovers!
- Coffee or espresso – Serving these brownies alongside a cup of coffee enhances their flavor profile and makes for an indulgent afternoon treat.
Enjoy every bite of your delicious red velvet brownies, whether you’re serving them at a gathering or indulging in a cozy night in!
Make Ahead and Storage
These fudgy red velvet brownies are perfect for meal prep! You can easily make them ahead of time and enjoy them throughout the week. Here’s how to store and preserve their deliciousness.
Storing Leftovers
- Store the brownies in an airtight container at room temperature for up to 3 days.
- If you want them to last longer, refrigerate them in an airtight container for up to a week.
- Always let brownies cool completely before storing to prevent them from becoming soggy.
Freezing
- Cut the cooled brownies into squares before freezing for easy serving.
- Wrap each piece tightly in plastic wrap or aluminum foil, then place them in a freezer-safe container or bag.
- They can be frozen for up to 3 months without losing flavor or texture.
Reheating
- To enjoy your brownies warm, simply microwave a square for about 10-15 seconds until warmed through.
- Alternatively, you can reheat them in a preheated oven at 350°F for about 5-10 minutes.
FAQs
Here are some common questions about making Red Velvet Brownies that might help you on your baking journey!
Can I substitute the butter in the Red Velvet Brownies recipe?
You can use coconut oil or a plant-based butter alternative if you’re looking for a dairy-free option. Just ensure it’s melted before mixing it into your batter.
How do I achieve the best texture for my Red Velvet Brownies?
To get that fudgy texture, be careful not to overmix after adding the dry ingredients. Mix until just combined, and you’ll have perfectly moist brownies!
Can I add nuts to my Red Velvet Brownies?
Absolutely! Chopped nuts like walnuts or pecans would make a delightful addition. Just fold them in with the white chocolate chips if you’re using those as well.
What makes these Red Velvet Brownies different from regular brownies?
The addition of red gel food coloring and cocoa powder gives these brownies their signature red velvet look and taste while still being rich and fudgy like traditional brownies.
Are these Red Velvet Brownies suitable for special occasions?
Yes, they are perfect for birthdays, holidays, or any celebration! Their vibrant color and delicious flavor are sure to impress guests.
Final Thoughts
I hope you find joy in making these delightful Red Velvet Brownies! With their rich flavor and beautiful color, they make every occasion just a little bit sweeter. Whether you’re treating yourself or sharing with friends and family, I’m sure they’ll love this indulgent treat as much as I do. Happy baking!
Red Velvet Brownies
Indulge in the delightful world of Red Velvet Brownies, where rich chocolate flavor meets a vibrant red hue. These fudgy treats are not only visually stunning but also incredibly easy to make, making them perfect for any occasion—from cozy family nights to festive gatherings. With just a handful of simple ingredients, you can whip up a batch that will have everyone asking for seconds. Serve them warm with a scoop of vanilla ice cream or drizzle with melted white chocolate for an added touch of sweetness. Whether you’re a seasoned baker or a novice in the kitchen, these brownies are sure to impress!
- Prep Time: 15 minutes
- Cook Time: 35 minutes
- Total Time: 50 minutes
- Yield: Makes approximately 16 brownies 1x
- Category: Dessert
- Method: Baking
- Cuisine: American
Ingredients
- 3/4 cup unsalted butter (melted)
- 2 oz chopped semi-sweet chocolate
- 1 & 1/4 cup granulated sugar
- 2 large eggs
- 2 teaspoons vanilla extract
- 1 teaspoon white vinegar
- 1/2 tablespoon red gel food coloring
- 2 tablespoons unsweetened cocoa powder
- 1 & 1/4 cup all-purpose flour
- 1/4 teaspoon salt
- Optional: 1/2 cup white chocolate chips
Instructions
- Preheat your oven to 350°F (175°C) and line an 8×8 inch baking pan with parchment paper.
- In a microwave-safe bowl, melt the butter and chopped chocolate together in increments, stirring until smooth.
- Allow the mixture to cool slightly before adding granulated sugar; mix well. Add eggs one at a time, mixing well after each addition along with vanilla extract, white vinegar, and red food coloring.
- In another bowl, sift together cocoa powder, flour, and salt. Gradually fold the dry mixture into the wet ingredients until just combined; avoid overmixing.
- If desired, fold in white chocolate chips. Pour batter into the prepared pan and spread evenly.
- Bake for 30-35 minutes or until a toothpick inserted comes out with moist crumbs.
- Cool completely before cutting into squares.
Nutrition
- Serving Size: 1 brownie (45g)
- Calories: 200
- Sugar: 18g
- Sodium: 95mg
- Fat: 10g
- Saturated Fat: 6g
- Unsaturated Fat: 4g
- Trans Fat: 0g
- Carbohydrates: 27g
- Fiber: 1g
- Protein: 2g
- Cholesterol: 40mg