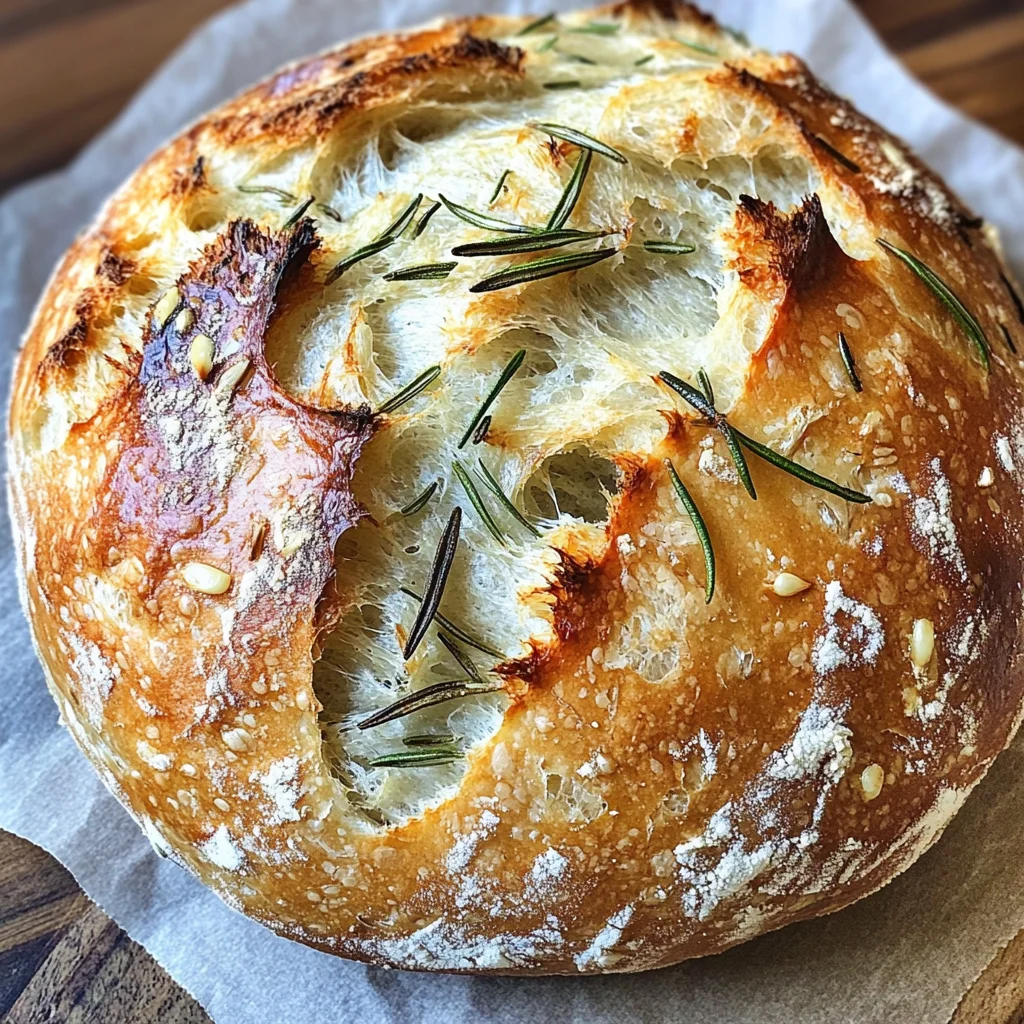
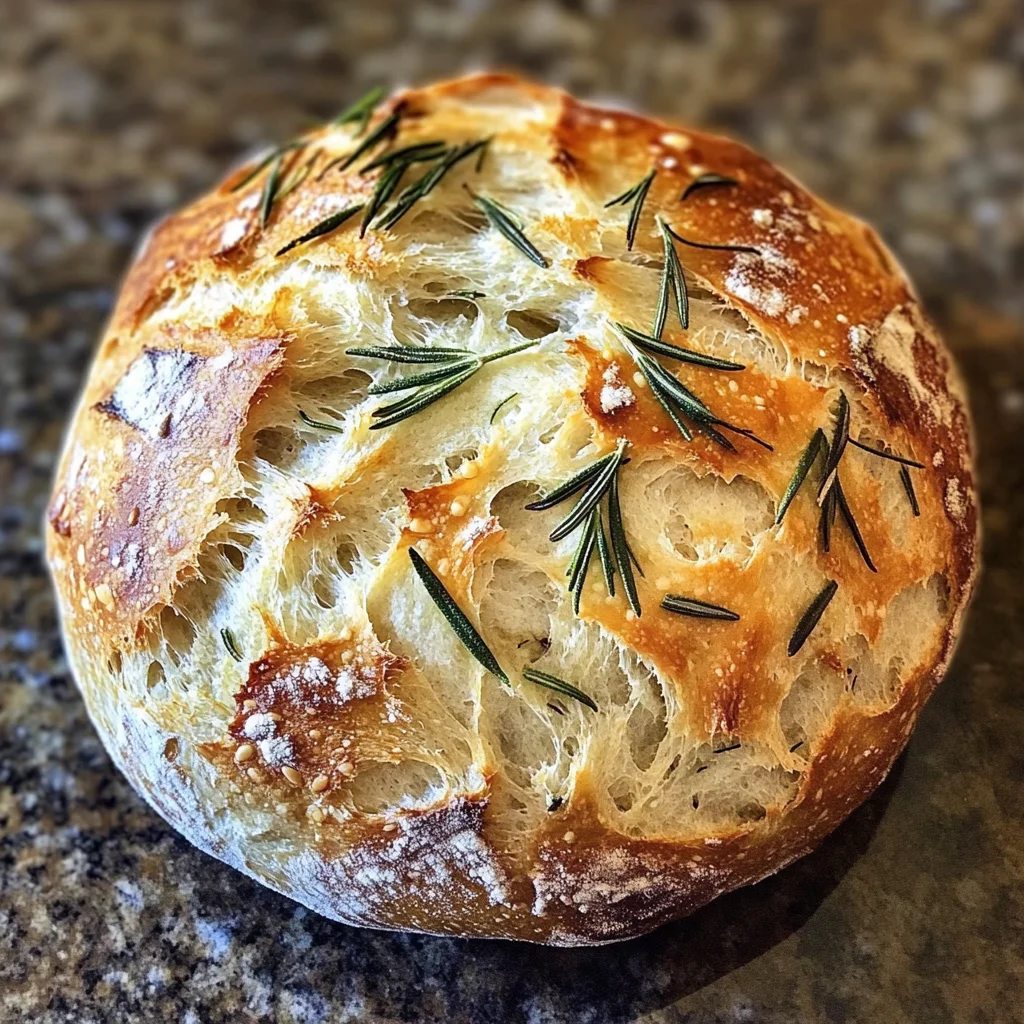
Rosemary & Roasted Garlic Artisan Bread
If you’re looking for a way to fill your home with the warm aroma of freshly baked bread, then this Rosemary & Roasted Garlic Artisan Bread is just what you need! This simple no-knead recipe has become a cherished favorite of mine. The combination of fragrant rosemary and sweet roasted garlic makes every bite a delight. Plus, it’s perfect for busy weeknights or family gatherings where everyone will gather around the table, eager to enjoy a slice.
What I love about this bread is how easy it is to prepare. With a little advance planning, you can have this crusty, chewy loaf ready to impress your loved ones. Whether served alongside soup, as a sandwich base, or simply enjoyed with olive oil, this artisan bread is sure to be a hit!
Why You’ll Love This Recipe
- Easy Preparation: No need for complex techniques! This no-knead bread comes together effortlessly.
- Family-Friendly Appeal: Kids and adults alike will love the aromatic flavors of rosemary and roasted garlic.
- Make-Ahead Convenience: With cold proofing, you can prepare the dough ahead of time and bake when you’re ready.
- Delicious Flavor: The combination of herbs and roasted garlic creates an irresistible savory loaf that’s hard to resist.
Ingredients You’ll Need
Let’s take a look at the simple, wholesome ingredients that make this Rosemary & Roasted Garlic Artisan Bread so special. All these ingredients work together to create a deliciously flavorful loaf.
- 1 head garlic
- Extra-virgin olive oil
- Coarse sea salt and freshly ground black pepper
- 1½ cups water, room temperature (at or near 70°F/21°C)
- 1 teaspoon active dry yeast
- 3 cups bread or all-purpose flour, plus more for dusting
- ½ teaspoon dried oregano
- 1 teaspoon kosher or fine sea salt
- 2 teaspoons finely chopped rosemary (plus more to sprinkle across the top)
- 1 whole head roasted garlic (smashed)
- 1 tablespoon extra-virgin olive oil
Variations
This recipe is wonderfully flexible! Here are some ideas to customize your Rosemary & Roasted Garlic Artisan Bread:
- Add Cheese: Incorporate shredded cheese like mozzarella or cheddar for an extra layer of flavor.
- Herb Swap: Experiment with other herbs such as thyme or basil if you want to change up the taste!
- Olive Add-In: Toss in some chopped olives for a Mediterranean twist that enhances the flavor profile.
- Seed Topping: Before baking, sprinkle sesame or poppy seeds on top for added crunch and flavor.
How to Make Rosemary & Roasted Garlic Artisan Bread
Step 1: Roast the Garlic
Start by slicing the head of garlic in half. Drizzle the exposed cloves with some olive oil and season them with coarse sea salt and freshly ground black pepper. Wrap it up in foil and roast it in the oven at 400ºF (204ºC) for about 40 minutes. This step is essential because roasting the garlic transforms its sharpness into sweet, buttery goodness that adds depth to your bread.
Step 2: Prepare the Dough
When you’re ready to get baking, sprinkle the active dry yeast over the room temperature water in a bowl and let it sit for about 10-15 minutes until it gets frothy. In another large bowl, combine the flour, dried oregano, kosher salt, and finely chopped rosemary. Mixing these dry ingredients before adding wet ones helps ensure even flavor distribution throughout your dough.
Step 3: Combine Ingredients
Now it’s time to combine! Pour your yeast mixture along with the smashed roasted garlic and olive oil into your flour mixture. Using a rubber spatula, gently mix everything until it’s just combined. Don’t worry if there are still bits of flour left around; that’s perfectly normal! The dough will be sticky but that’s what makes it so great.
Step 4: Let It Rise
Cover your bowl with plastic wrap or a clean kitchen towel and place it somewhere warm. Allow it to rise until doubled in size—this usually takes about 8-10 hours. This slow rise gives your artisan bread its lovely texture and flavor.
Step 5: Shape Your Dough
Once your dough has risen beautifully, lightly flour your work surface and turn out the dough onto it. Gently fold it over itself several times until you form a soft ball coated with flour. Place this seam side up into a floured bowl or proofing basket. Dust with more flour, cover it again, and pop it in the refrigerator overnight—or up to 48 hours—if you’re not quite ready to bake yet!
Step 6: Preheat Your Oven
When you’re ready to bake your bread, preheat your oven to 450ºF (232ºC). Make sure you put your Dutch oven inside as well; preheating ensures that you’ll get that crispy crust we all love!
Step 7: Shape Again
Take your chilled dough from the fridge and gently invert it onto parchment paper seam side down. If necessary, shape it into a loaf form using your hands—don’t forget to score its top with a sharp knife or razor blade; this allows steam to escape while baking!
Step 8: Bake Your Bread
Carefully transfer your dough on parchment into the hot Dutch oven. Cover it up and bake for about 30 minutes before removing the lid for an additional 15-20 minutes until golden brown on top. You know it’s done when tapping on its crust sounds hollow—what a beautiful sound!
Step 9: Cool Down
Using parchment edges as handles, lift your loaf out of the Dutch oven and place it on a wire cooling rack. Allow it to cool completely for up to an hour before slicing into it—if you can wait that long! Enjoy every warm slice of this delightful Rosemary & Roasted Garlic Artisan Bread!
Pro Tips for Making Rosemary & Roasted Garlic Artisan Bread
Baking bread at home can be incredibly rewarding, and with a few simple tips, you can elevate your artisan bread to perfection!
- Use fresh rosemary – Fresh herbs pack a punch of flavor that dried herbs often can’t match. If possible, opt for fresh rosemary to give your bread an aromatic boost.
- Be patient with rising – Allowing your dough to rise slowly enhances the flavor and texture. If you can, let it rise overnight in the refrigerator; this will develop deeper flavors and improve the crust.
- Preheat your Dutch oven – A hot Dutch oven creates the ideal baking environment by trapping steam, which helps your bread develop a beautiful crust. Don’t skip this step!
- Score your dough – Scoring allows for better expansion during baking and adds a lovely decorative element. Be creative with your designs for a rustic look!
- Cool completely before slicing – While it’s tempting to cut into warm bread, letting it cool ensures that the texture sets properly. This will prevent a gummy loaf and provide a better eating experience.
How to Serve Rosemary & Roasted Garlic Artisan Bread
This delightful artisan bread shines brightest when paired with complementary flavors and textures. Here are some ideas on how to present it beautifully!
Garnishes
- Olive oil and balsamic vinegar drizzles – A simple drizzle of high-quality olive oil mixed with balsamic vinegar creates an elegant touch that enhances the bread’s flavor.
- Chopped fresh herbs – Sprinkle some additional chopped rosemary or parsley on top just before serving for a burst of color and freshness.
Side Dishes
- Roasted Vegetables – A colorful medley of seasonal vegetables, such as bell peppers, zucchini, and carrots, roasted with olive oil and herbs makes for a satisfying side that complements the bread’s savory notes.
- Creamy Tomato Soup – The classic pairing! A warm bowl of tomato soup provides a perfect dip for your artisan bread, making for a comforting meal any day of the week.
- Mixed Green Salad – Toss together arugula, spinach, or mixed greens with cherry tomatoes and cucumbers. Drizzle with lemon vinaigrette for a refreshing contrast to the rich flavors of the bread.
- Hummus and Veggie Platter – Serve slices of this artisan bread alongside flavorful hummus and crunchy veggies like carrots or cucumber sticks for a healthy snacking option that everyone will enjoy.
With these tips and serving suggestions, you’ll be all set to impress friends and family with your homemade Rosemary & Roasted Garlic Artisan Bread! Happy baking!
Make Ahead and Storage
This Rosemary & Roasted Garlic Artisan Bread is not only delightful to make, but it’s also perfect for meal prep! You can bake it ahead of time and enjoy it fresh over several days or even store some for later.
Storing Leftovers
- Allow the bread to cool completely before storing.
- Wrap the loaf tightly in plastic wrap or foil to keep moisture in.
- Store at room temperature for up to 3 days. For longer freshness, consider freezing.
Freezing
- Once cooled, slice the bread if desired for easier thawing.
- Wrap each slice individually in plastic wrap, then place them in a freezer-safe bag.
- Freeze for up to 3 months. Remember to label the bag with the date!
Reheating
- For slices, preheat your oven to 350°F (175°C) and place them on a baking sheet.
- Heat for about 10 minutes or until warmed through.
- For whole loaves, cover with foil and heat in the oven for 15-20 minutes until warmed and crusty.
FAQs
Here are some common questions you might have about making Rosemary & Roasted Garlic Artisan Bread.
Can I use fresh garlic instead of roasted garlic in Rosemary & Roasted Garlic Artisan Bread?
Using fresh garlic will change the flavor profile significantly. Roasting mellows the garlic’s sharpness and adds a sweet, rich flavor that complements the rosemary beautifully. If you prefer fresh garlic, consider using only a small amount.
How can I make my Rosemary & Roasted Garlic Artisan Bread crustier?
To achieve a crustier loaf, bake your bread in a preheated Dutch oven with the lid on for part of the baking time. This traps steam inside, creating that desirable crunchy crust.
How long does Rosemary & Roasted Garlic Artisan Bread last?
When stored properly at room temperature, this artisan bread can last for about 3 days. For longer storage, freezing is recommended.
Can I add other herbs to my Rosemary & Roasted Garlic Artisan Bread?
Absolutely! Feel free to experiment with herbs like thyme or basil alongside rosemary. Just be mindful not to overpower the flavors.
Final Thoughts
I hope you find joy in making this delicious Rosemary & Roasted Garlic Artisan Bread! It’s special because it combines simple ingredients with aromatic flavors that elevate any meal. Whether you’re enjoying it fresh from the oven or as part of your meal prep, it’s sure to bring warmth and comfort into your home. Happy baking! I can’t wait for you to try this recipe!
Rosemary & Roasted Garlic Artisan Bread
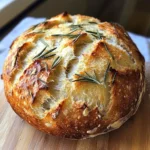
Indulge in the warm, aromatic experience of Rosemary & Roasted Garlic Artisan Bread, a delightful addition to any meal. This no-knead recipe combines the fragrant essence of fresh rosemary with the sweet richness of roasted garlic, creating a crusty yet chewy loaf that’s perfect for soups, sandwiches, or simply dipping in olive oil. Ideal for busy weeknights or family gatherings, this artisan bread is straightforward to prepare and offers make-ahead convenience. With just a few simple ingredients and minimal effort, you can impress your loved ones with this flavorful creation that fills your home with irresistible scents.
- Prep Time: 15 minutes
- Cook Time: 55 minutes
- Total Time: 1 hour 10 minutes
- Yield: Approximately 12 servings 1x
- Category: Bread
- Method: Baking
- Cuisine: American
Ingredients
- 1 head garlic
- Extra-virgin olive oil
- Coarse sea salt
- Freshly ground black pepper
- 1½ cups water (room temperature)
- 1 teaspoon active dry yeast
- 3 cups bread or all-purpose flour
- ½ teaspoon dried oregano
- 1 teaspoon kosher salt
- 2 teaspoons finely chopped rosemary (plus extra for topping)
Instructions
- Preheat your oven to 400°F (204°C). Slice the garlic head in half, drizzle with olive oil and season. Wrap in foil and roast for about 40 minutes.
- In a bowl, combine yeast with room temperature water and let it sit until frothy (10-15 minutes).
- In a separate bowl, mix flour, oregano, kosher salt, and chopped rosemary.
- Combine the yeast mixture, smashed roasted garlic, and olive oil with the dry ingredients using a spatula until just mixed.
- Cover the bowl and let it rise in a warm place until doubled (8-10 hours).
- Shape the dough into a ball on a floured surface and place it seam side up in a floured bowl. Cover and refrigerate overnight or up to 48 hours.
- Preheat your oven to 450°F (232°C) with a Dutch oven inside.
- Shape chilled dough onto parchment paper seam side down; score the top.
- Transfer into hot Dutch oven; bake covered for 30 minutes then uncover for an additional 15-20 minutes until golden brown.
- Cool on a wire rack before slicing.
Nutrition
- Serving Size: 1 slice (50g)
- Calories: 140
- Sugar: 0g
- Sodium: 210mg
- Fat: 3g
- Saturated Fat: 0.5g
- Unsaturated Fat: 2g
- Trans Fat: 0g
- Carbohydrates: 25g
- Fiber: 1g
- Protein: 4g
- Cholesterol: 0mg