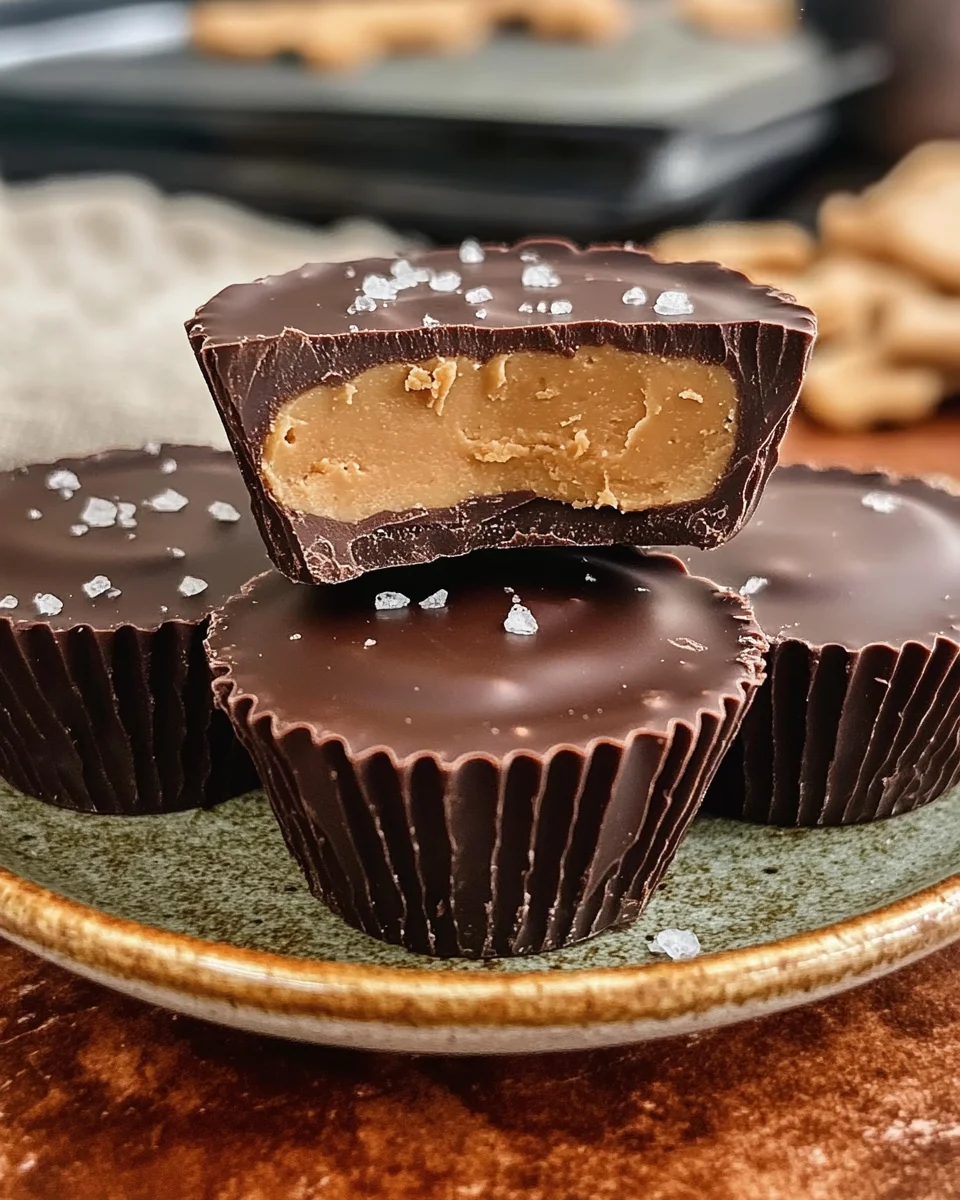
Homemade Reese’s Cups Recipe
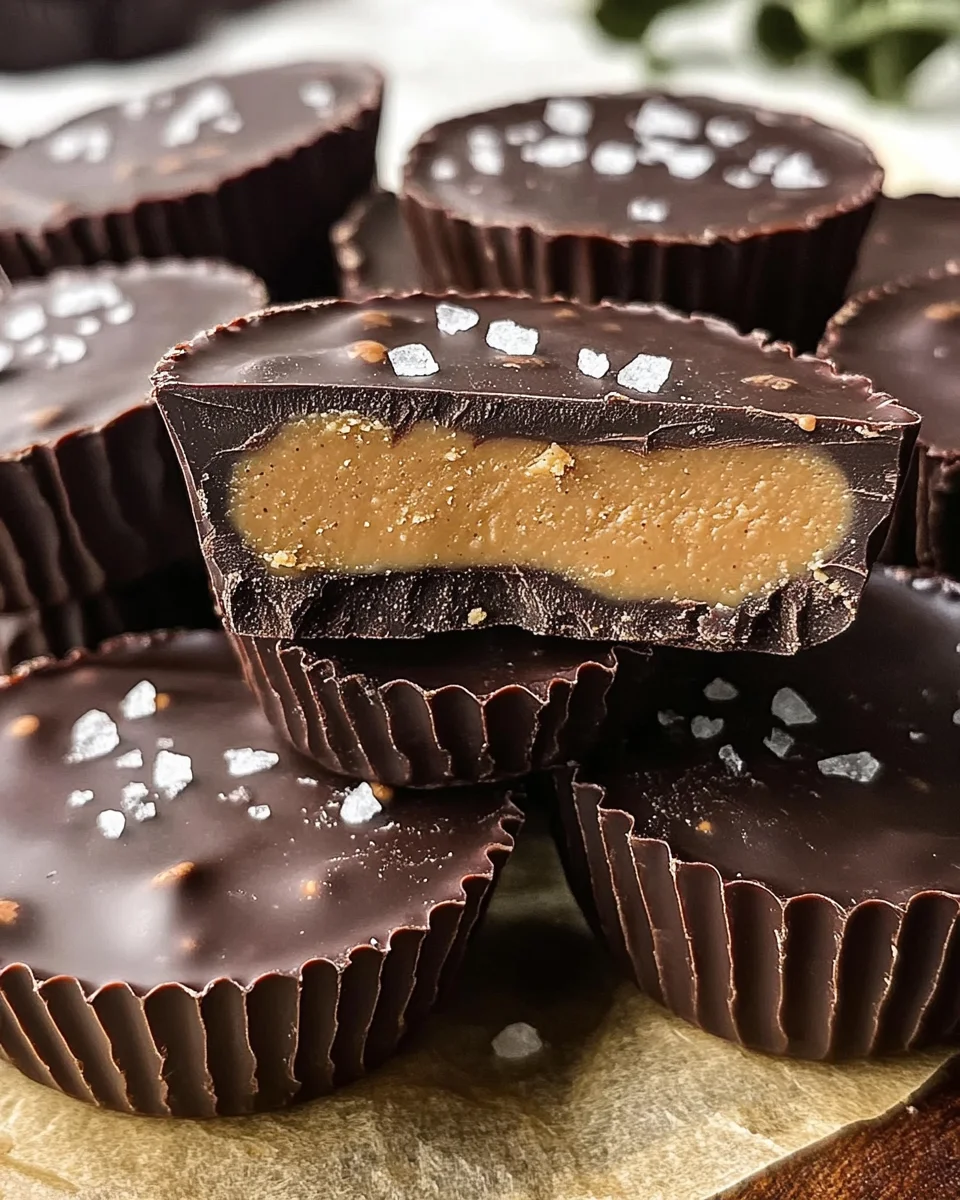
Indulge in the delightful world of homemade Reese’s cups with this easy-to-follow recipe. The Homemade Reese’s Cups Recipe brings the perfect balance of creamy peanut butter and luscious chocolate to your kitchen. Ideal for parties, movie nights, or just a sweet treat for yourself, these cups are sure to impress. With just a few simple ingredients and steps, you can create a nostalgic dessert that rivals store-bought options.
Why You’ll Love This Recipe
- Easy to Make: This recipe only requires a handful of ingredients and minimal cooking skills, making it perfect for beginners.
- Customizable: Feel free to experiment with the fillings or chocolate types to suit your taste preferences.
- Perfect for Any Occasion: Whether it’s a holiday gathering or a casual weekend, these treats are always a hit.
- Rich Flavor: The combination of creamy peanut butter with rich chocolate is irresistible and satisfying.
- Great for Gift Giving: Package these cups in cute boxes for a thoughtful homemade gift.
Tools and Preparation
Before diving into the deliciousness, gather your tools to ensure everything goes smoothly. Having the right equipment will make preparing your homemade Reese’s cups easier.
Essential Tools and Equipment
- Muffin tin
- Cupcake liners
- Microwave-safe bowl
- Mixing bowl
- Whisk or electric mixer
Importance of Each Tool
- Muffin tin: Essential for shaping your Reese’s cups uniformly.
- Cupcake liners: Help remove the cups easily and keep them neat while serving.
- Microwave-safe bowl: Necessary for melting chocolate safely without burning it.
Ingredients
Indulge in the nostalgic bliss of homemade Reese’s cups, capturing the perfect blend of creamy peanut butter and rich chocolate for an unforgettable treat.
For the Chocolate Base
- 14 ounces semi-sweet chocolate chips, divided in half
For the Peanut Butter Filling
- 1 cup creamy peanut butter
- 6 tablespoons powdered sugar
- 4 tablespoons butter, softened
How to Make Homemade Reese’s Cups Recipe
Step 1: Melt the Chocolate
- Melt half of the semi-sweet chocolate chips in a microwave-safe bowl.
- Use 30-second intervals in the microwave, stirring each time until smooth.
Step 2: Prepare the Cupcake Liners
- Spoon about ½ tablespoon of melted chocolate into each cupcake liner.
- Gently shake the muffin tin to spread the chocolate evenly across the bottom.
Step 3: Set the Chocolate Base
- Place the muffin tin in the freezer for 15 minutes until set.
Step 4: Make the Peanut Butter Filling
- In a mixing bowl, beat together creamy peanut butter, powdered sugar, and softened butter until smooth and creamy.
Step 5: Add Peanut Butter Filling
- Spoon 1 tablespoon of this mixture onto each set chocolate base, making sure it is centered.
Step 6: Freeze Again
- Freeze again for 5 minutes to allow filling to set slightly.
Step 7: Cover with Remaining Chocolate
- Melt the remaining semi-sweet chocolate chips as before.
- Spoon over each peanut butter layer to cover completely.
Step 8: Final Setting
- Freeze for another 10 to 15 minutes or refrigerate for about 15 to 20 minutes until fully set.
Step 9: Serve Your Treats
- Once set, carefully remove from muffin tins by peeling off cupcake liners.
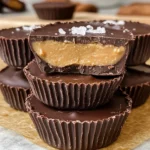
- Arrange on a platter and sprinkle some sea salt on top before serving for an extra touch!
How to Serve Homemade Reese’s Cups Recipe
Homemade Reese’s cups are a delightful treat that can be enjoyed in various ways. Whether you’re hosting a party or simply indulging yourself, these suggestions will elevate your experience.
With a Glass of Milk
- A classic pairing, milk complements the rich chocolate and creamy peanut butter perfectly, making for a nostalgic snack.
Drizzled with Caramel
- Add a drizzle of warm caramel sauce on top for an extra layer of sweetness and flavor that pairs beautifully with the chocolate and peanut butter.
Topped with Sea Salt
- Sprinkle a pinch of sea salt on each cup just before serving to enhance the flavors and add a touch of sophistication to your dessert.
In Ice Cream Sundaes
- Chop up the homemade cups and mix them into your favorite ice cream sundae for a fun twist that adds texture and taste.
Alongside Fresh Fruit
- Serve these cups with slices of fresh fruit like strawberries or bananas for a refreshing contrast to the richness of the chocolate.
As Party Favors
- Wrap each cup in decorative foil or place them in small boxes to give as party favors. They make great gifts for any occasion!
How to Perfect Homemade Reese’s Cups Recipe
To ensure your homemade Reese’s cups turn out perfectly every time, follow these helpful tips.
- Use quality chocolate – Choose high-quality semi-sweet chocolate chips for the best flavor and texture in your cups.
- Chill properly – Make sure to freeze each layer as directed. This helps maintain structure and makes them easier to peel from the liners.
- Experiment with fillings – Try adding crushed nuts or different flavored nut butters for a unique twist on the classic recipe.
- Store correctly – Keep your Reese’s cups in an airtight container at room temperature or in the fridge for longer freshness.
- Customize sizes – Use mini muffin tins for bite-sized treats or large muffin tins for bigger indulgences, depending on your preference.
- Add toppings – Consider adding toppings like crushed pretzels or sprinkles before the final chocolate layer sets for added texture and flavor.
Best Side Dishes for Homemade Reese’s Cups Recipe
While homemade Reese’s cups are delicious on their own, pairing them with certain side dishes can enhance your dessert experience. Here are some great options:
-
Fresh Fruit Salad
A vibrant mix of seasonal fruits adds freshness and balances the sweetness of the cups. -
Chocolate Dipped Strawberries
These complement the flavors of peanut butter and chocolate while providing an elegant touch to your dessert table. -
Mini Cheesecakes
Rich mini cheesecakes offer a creamy counterpart that pairs well with the crunch of homemade Reese’s cups. -
Coffee or Espresso
A warm cup of coffee enhances the chocolate flavor while providing a comforting beverage alongside your treat. -
Homemade Whipped Cream
Light and fluffy whipped cream can serve as a delightful topping or side dip, adding creaminess to every bite. -
Nutty Granola Bars
For those looking for something more substantial, crunchy granola bars add texture and make for a satisfying snack alongside your dessert.
Common Mistakes to Avoid
Making homemade Reese’s cups can be a delightful experience, but there are common mistakes that can hinder your success.
- Overheating Chocolate: Melting chocolate too quickly can cause it to seize. Always melt in short intervals and stir well.
- Skipping the Freezing Steps: Not allowing the layers to freeze adequately may result in a messy final product. Be patient and freeze each layer as instructed.
- Using Chunky Peanut Butter: For a smooth filling, stick to creamy peanut butter. Chunky varieties can disrupt the texture of your cups.
- Not Measuring Ingredients Accurately: Eyeballing ingredients can lead to imbalances in flavor and texture. Use precise measurements for best results.
- Removing Liners Too Quickly: Peeling off liners right after freezing can tear the chocolate cups. Wait until they are fully set before removing.
Storage & Reheating Instructions
Refrigerator Storage
- Store homemade Reese’s cups in an airtight container.
- They will stay fresh for up to one week in the refrigerator.
Freezing Homemade Reese’s Cups Recipe
- Place them in a freezer-safe container or bag.
- They can be frozen for up to three months.
Reheating Homemade Reese’s Cups Recipe
- Oven: Preheat to 350°F (175°C) and warm for 5-10 minutes until slightly softened.
- Microwave: Heat on low power for about 15 seconds, checking frequently to avoid melting too much.
- Stovetop: Use a double boiler for gentle warming; this helps retain their shape while softening slightly.
Frequently Asked Questions
Here are some common questions about making homemade Reese’s cups.
Can I use dark chocolate instead of semi-sweet?
Yes, you can use dark chocolate for a richer flavor, but keep an eye on the melting process as it behaves differently than semi-sweet chocolate.
How do I customize my homemade Reese’s cups recipe?
Feel free to add toppings like crushed nuts or drizzle caramel on top before freezing for added flavor and texture.
What is the best way to store homemade Reese’s cups?
Store them in an airtight container in the fridge or freezer, depending on how soon you plan to eat them.
How long do homemade Reese’s cups last?
When stored properly, they last about one week in the refrigerator and up to three months if frozen.
Can I make these peanut butter cups vegan?
Yes! Substitute dairy-free chocolate and use a plant-based butter alternative along with natural peanut butter.
Final Thoughts
This Homemade Reese’s Cups Recipe is not only a nostalgic treat but also incredibly versatile. You can customize it with various chocolates or toppings, making it perfect for any occasion. Try this recipe today and enjoy the comforting blend of flavors that will satisfy your sweet cravings!
Homemade Reese’s Cups Recipe
Indulge in the sweet nostalgia of Homemade Reese’s Cups with this simple recipe that combines rich chocolate and creamy peanut butter. Perfect for any occasion, these delightful treats are easy to make and can be customized to suit your taste. Whether you’re hosting a party or craving a special snack, this recipe offers a fun and rewarding experience in the kitchen. With just a few ingredients and straightforward steps, you’ll create irresistible cups that rival store-bought versions. Enjoy them fresh, gift them to friends, or serve them at gatherings—these homemade delights are sure to impress!
- Prep Time: 15 minutes
- Cook Time: 20 minutes
- Total Time: 35 minutes
- Yield: Approximately 12 servings 1x
- Category: Dessert
- Method: No-bake
- Cuisine: American
Ingredients
- 14 ounces semi-sweet chocolate chips
- 1 cup creamy peanut butter
- 6 tablespoons powdered sugar
- 4 tablespoons softened butter
Instructions
- Melt half of the chocolate chips in a microwave-safe bowl using 30-second intervals until smooth.
- Spoon about ½ tablespoon of melted chocolate into cupcake liners placed in a muffin tin; shake gently to spread evenly.
- Freeze for 15 minutes until set.
- Mix peanut butter, powdered sugar, and softened butter until smooth.
- Place 1 tablespoon of peanut butter filling on top of each chocolate base.
- Freeze for an additional 5 minutes.
- Cover with remaining melted chocolate and freeze for another 10-15 minutes or refrigerate until set.
- Remove from muffin tins by peeling off the liners and enjoy.
Nutrition
- Serving Size: 1 cup (35g)
- Calories: 150
- Sugar: 10g
- Sodium: 40mg
- Fat: 9g
- Saturated Fat: 3g
- Unsaturated Fat: 6g
- Trans Fat: 0g
- Carbohydrates: 14g
- Fiber: 1g
- Protein: 3g
- Cholesterol: 5mg