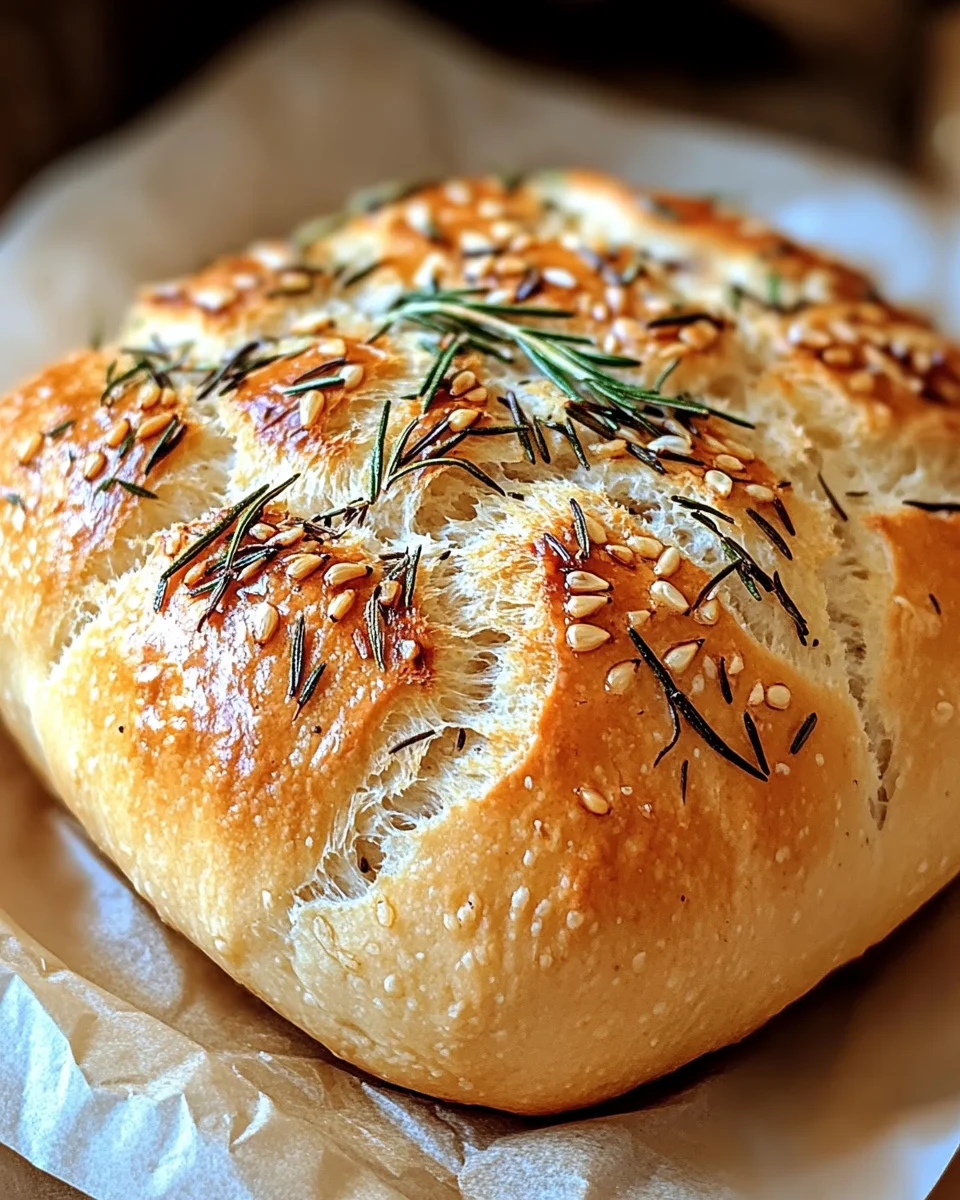
Easy Roasted Garlic Rosemary Artisan Bread – The Best Homemade Loaf
Easy Roasted Garlic Rosemary Artisan Bread – The Best Homemade Loaf is a delightful treat that brings the rich, savory flavors of roasted garlic and aromatic rosemary into a beautiful crusty loaf. This no-knead recipe makes it easy for anyone to create a bakery-quality bread at home. Perfect for dinner parties, family gatherings, or simply enjoying with your favorite soup, this artisan bread is sure to impress.
Why You’ll Love This Recipe
- Simple Preparation: This no-knead recipe allows you to make delicious homemade bread without the fuss of traditional kneading.
- Flavor Packed: With roasted garlic and fresh rosemary, each bite is bursting with rich flavor that elevates any meal.
- Versatile Usage: Serve this bread as a side dish, use it for sandwiches, or enjoy it on its own with butter or olive oil.
- Perfectly Crusty: The Dutch oven baking method creates a crispy crust while keeping the inside soft and chewy.
- Time Efficient: With minimal hands-on time required, you can set it aside to rise while you go about your day.
Tools and Preparation
To make your Easy Roasted Garlic Rosemary Artisan Bread successfully, having the right tools is essential. Here’s what you’ll need:
Essential Tools and Equipment
- Dutch oven
- Mixing bowls
- Spatula
- Parchment paper
- Clean towel
Importance of Each Tool
- Dutch oven: Provides even heat distribution and helps achieve that perfect crust.
- Mixing bowls: Vital for combining ingredients easily and allowing the dough to rise properly.
- Parchment paper: Prevents sticking and makes transferring the dough hassle-free.
Ingredients
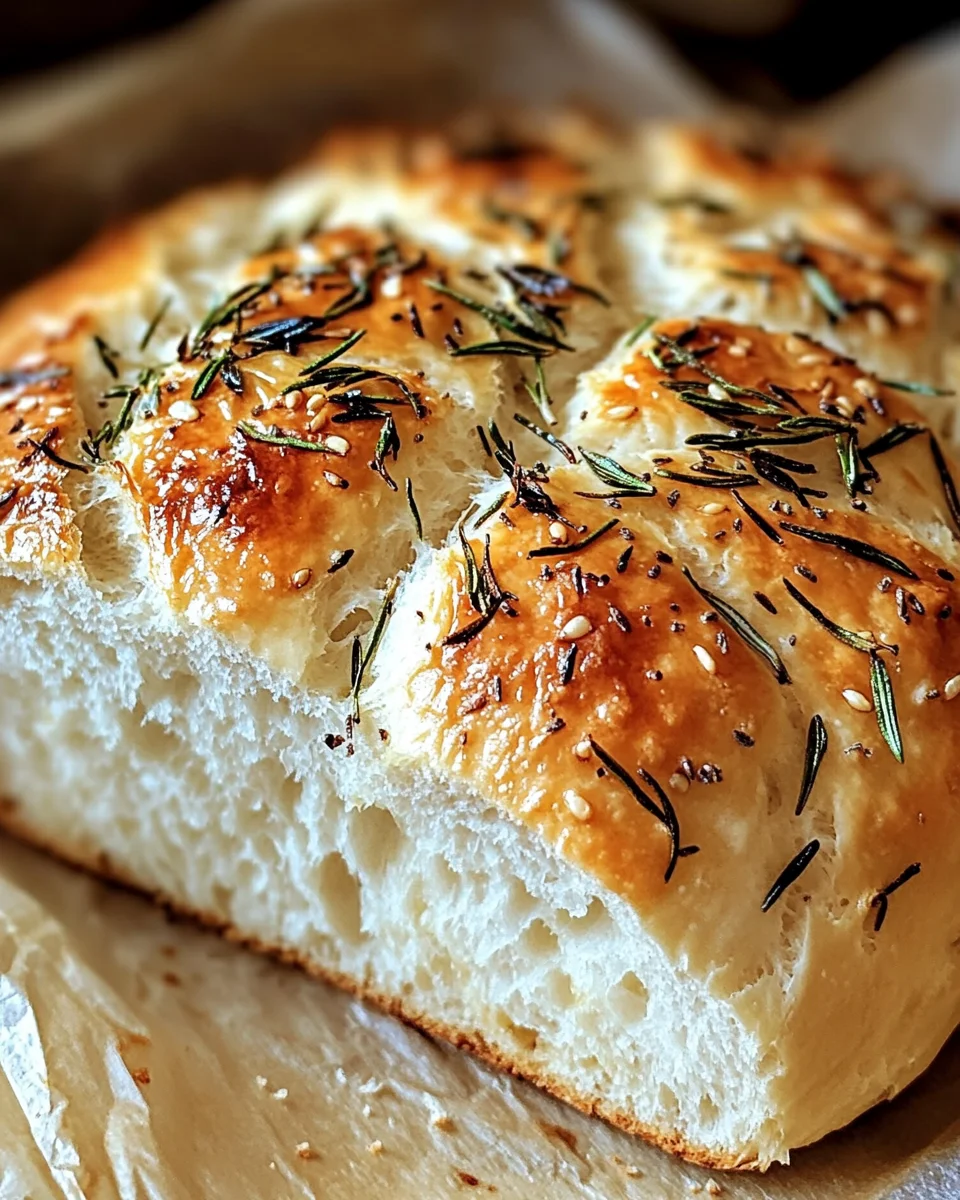
Easy Roasted Garlic Rosemary Artisan Bread is crusty, chewy, and loaded with flavor. Make the perfect homemade loaf with this no-knead, rustic recipe.
For the Bread Dough:
- 1 whole head garlic
- 1 tablespoon extra-virgin olive oil (divided)
- Coarse sea salt & freshly ground black pepper
- 1½ cups water (room temperature, ~70°F / 21°C)
- 1 teaspoon active dry yeast
- 3 cups bread or all-purpose flour (plus more for dusting)
- ½ teaspoon dried oregano
- 1 teaspoon kosher or fine sea salt
- 2 teaspoons finely chopped fresh rosemary (plus more for topping)
- 1 head roasted garlic cloves (smashed)
How to Make Easy Roasted Garlic Rosemary Artisan Bread – The Best Homemade Loaf
Step 1: Roast the Garlic
- Preheat oven to 400°F (204°C).
- Cut the garlic head in half and drizzle exposed cloves with olive oil. Sprinkle with salt and pepper.
- Wrap the garlic in foil and roast for 40 minutes.
- Once cooled, remove cloves from skins.
Step 2: Mix the Dough
- In a small bowl, dissolve yeast in room-temperature water and let sit for 10–15 minutes.
- In a large bowl, combine flour, salt, oregano, and rosemary.
- Add yeast water, roasted garlic, and remaining olive oil to the dry ingredients.
- Mix with a spatula until sticky.
Step 3: First Rise
- Cover the bowl with a clean towel.
- Let rise at room temperature for 8–10 hours until doubled in size.
Step 4: Shape and Cold Ferment
- Turn dough onto a floured surface and gently shape into a ball.
- Place seam-side up in a floured bowl or basket.
- Cover and refrigerate for 1–24 hours (up to 48 hours for deeper flavor).
Step 5: Preheat Oven & Score
- Preheat oven to 450°F (232°C) with a Dutch oven inside.
- Remove dough from fridge; invert onto parchment paper seam-side down.
- Score top of dough with a sharp blade.
Step 6: Bake
- Place dough with parchment into preheated Dutch oven.
- Cover and bake for 30 minutes.
- Uncover and bake another 15–20 minutes until golden brown.
Step 7: Cool & Slice
- Remove from Dutch oven once baked.
- Cool on wire rack for at least 1 hour before slicing.
Now you have your very own Easy Roasted Garlic Rosemary Artisan Bread – The Best Homemade Loaf ready to savor! Enjoy this delicious creation fresh out of your kitchen!
How to Serve Easy Roasted Garlic Rosemary Artisan Bread – The Best Homemade Loaf
Easy Roasted Garlic Rosemary Artisan Bread is a versatile loaf that can elevate any meal. Its crusty exterior and soft, flavorful interior make it perfect for various serving options.
With Olive Oil and Balsamic Vinegar
- Drizzle high-quality olive oil and balsamic vinegar on a plate for dipping. This combination enhances the bread’s natural flavors.
As a Sandwich Base
- Use slices of this artisan bread to create delicious sandwiches. The robust flavor pairs well with meats, cheeses, and fresh vegetables.
Toasted with Butter
- Spread softened butter on warm slices for a simple yet satisfying treat. You can also add herbs or garlic for extra flavor.
With Soups and Stews
- Serve alongside hearty soups or stews to soak up the rich broth. This pairing makes for a comforting meal on chilly days.
As a Bruschetta Base
- Top toasted slices with fresh tomatoes, basil, and mozzarella for an easy bruschetta appetizer. It’s a crowd-pleaser at gatherings.
For Cheese Boards
- Include this bread in your cheese platter. Its unique taste complements various cheeses, making it an excellent choice for entertaining.
How to Perfect Easy Roasted Garlic Rosemary Artisan Bread – The Best Homemade Loaf
To achieve the best results with your Easy Roasted Garlic Rosemary Artisan Bread, follow these tips for perfection.
- Use Fresh Ingredients: Ensure your yeast and flour are fresh for optimal rise and texture.
- Control the Temperature: Keep your water temperature around 70°F (21°C) to activate the yeast without killing it.
- Allow Proper Rising Time: Don’t rush the rising process; letting the dough rise longer enhances its flavor.
- Score Correctly: Use a sharp blade to score the top of the dough before baking. This helps steam escape and gives the loaf its beautiful shape.
- Cool Before Slicing: Let the bread cool for at least one hour before slicing to maintain its texture and prevent gumminess.
- Experiment with Herbs: Feel free to add different herbs or spices based on your preference; rosemary pairs beautifully but other flavors can shine too.
Best Side Dishes for Easy Roasted Garlic Rosemary Artisan Bread – The Best Homemade Loaf
This artisan bread pairs wonderfully with a variety of side dishes that complement its rustic flavor profile. Consider these options when planning your meal.
- Classic Tomato Soup: A warm bowl of tomato soup provides a comforting pairing that enhances the bread’s deliciousness.
- Caesar Salad: The crisp romaine and creamy dressing contrast beautifully with the chewy texture of the bread.
- Grilled Vegetables: Seasonal grilled veggies add a smoky flavor that works well with this artisan loaf.
- Beef Stew: A hearty beef stew is perfect for soaking up all that rich gravy, making every bite delightful.
- Roasted Potatoes: Crispy roasted potatoes seasoned with herbs offer a crunchy side that complements the chewy bread.
- Spinach Artichoke Dip: A creamy dip served warm is great for spreading on slices, creating an indulgent appetizer experience.
- Stuffed Peppers: These vibrant peppers filled with grains or meats provide a colorful addition to your table.
- Caprese Salad: Fresh mozzarella, tomatoes, and basil drizzled with balsamic vinegar make for a refreshing side dish that balances out the richness of the bread.
Common Mistakes to Avoid
Making Easy Roasted Garlic Rosemary Artisan Bread can be a delightful experience, but there are some common pitfalls to watch out for.
- Overproofing the Dough: Allowing the dough to rise for too long can lead to a dense loaf. Keep an eye on it and remove it once it has doubled in size.
- Not Using Fresh Ingredients: Stale yeast or old flour can ruin your bread. Always check expiration dates and use fresh ingredients for the best results.
- Skipping the Cold Fermentation: Neglecting this step can result in less flavor. Aim for at least a few hours of cold fermentation to enhance the taste.
- Incorrect Oven Temperature: Baking at the wrong temperature may burn the crust or undercook the inside. Use an oven thermometer to ensure accuracy.
- Failing to Score the Dough: Not scoring creates a tough crust. Make sure to cut a few slashes on top before baking for better expansion and texture.
Storage & Reheating Instructions
Refrigerator Storage
- Store your Easy Roasted Garlic Rosemary Artisan Bread in an airtight container for up to 3 days.
- Wrap it tightly in plastic wrap or aluminum foil to maintain freshness.
Freezing Easy Roasted Garlic Rosemary Artisan Bread – The Best Homemade Loaf
- Freeze slices in freezer-safe bags for up to 3 months.
- Ensure you remove as much air as possible from bags before sealing.
Reheating Easy Roasted Garlic Rosemary Artisan Bread – The Best Homemade Loaf
- Oven: Preheat to 350°F (175°C) and warm bread for about 10 minutes.
- Microwave: Heat individual slices for 15-20 seconds; cover with a damp paper towel to retain moisture.
- Stovetop: Warm slices in a skillet over medium heat for about 2 minutes per side.
Frequently Asked Questions
Here are some common questions about making Easy Roasted Garlic Rosemary Artisan Bread.
How do I know if my dough has risen enough?
Your dough is ready when it has doubled in size and feels airy. You can also gently poke it, and if it springs back slowly, it’s good to go.
Can I substitute fresh rosemary in the recipe?
Yes, you can use dried rosemary if fresh is unavailable. Use approximately one-third of the amount since dried herbs are more concentrated.
What makes this bread artisan?
This bread is considered artisan because of its rustic style and handcrafted nature, showcasing unique flavors such as roasted garlic and rosemary.
Can I add other herbs or spices?
Absolutely! Feel free to customize your Easy Roasted Garlic Rosemary Artisan Bread with herbs like thyme or spices like crushed red pepper for added flavor.
How should I serve this bread?
This delicious bread pairs well with soups, salads, or simply with butter. It’s perfect as a side dish or even as a base for sandwiches.
Final Thoughts
Easy Roasted Garlic Rosemary Artisan Bread is not only flavorful but also versatile. You can enjoy it as part of any meal or customize it with various herbs and spices according to your taste preferences. Give this recipe a try, and you’ll be rewarded with an amazing homemade loaf that everyone will love!
Easy Roasted Garlic Rosemary Artisan Bread – The Best Homemade Loaf

Easy Roasted Garlic Rosemary Artisan Bread – The Best Homemade Loaf is a flavorful, crusty delight that brings the warmth of freshly baked bread to your kitchen. This no-knead recipe infuses savory roasted garlic and aromatic rosemary into a beautiful loaf, making it perfect for any occasion—from family dinners to cozy nights in. With minimal hands-on time required, you can enjoy the satisfaction of baking artisan bread without the fuss. The unique Dutch oven method ensures a crispy exterior while keeping the inside soft and chewy, creating a bread that will impress anyone who takes a bite. Whether served with olive oil for dipping or as the base for hearty sandwiches, this artisan bread is sure to become a favorite in your home.
- Prep Time: 15 minutes
- Cook Time: 50 minutes
- Total Time: 1 hour 5 minutes
- Yield: Approximately 12 servings 1x
- Category: Bread
- Method: Baking
- Cuisine: American
Ingredients
- 1 whole head garlic
- 1 tablespoon extra-virgin olive oil
- 1½ cups room temperature water
- 1 teaspoon active dry yeast
- 3 cups bread or all-purpose flour
- ½ teaspoon dried oregano
- 1 teaspoon kosher salt
- 2 teaspoons finely chopped fresh rosemary
Instructions
- Preheat your oven to 400°F (204°C) and roast the halved garlic drizzled with olive oil for 40 minutes.
- Combine yeast with room temperature water in a small bowl; let sit for 10–15 minutes.
- In a large bowl, mix flour, salt, oregano, and rosemary. Add yeast mixture and roasted garlic; stir until sticky.
- Cover and let rise at room temperature for 8–10 hours.
- Shape the dough into a ball, place seam-side up in a floured bowl, cover, and refrigerate for up to 48 hours.
- Preheat oven to 450°F (232°C) with a Dutch oven inside. Score the dough and bake covered for 30 minutes, then uncovered for an additional 15–20 minutes until golden brown.
- Cool on a wire rack before slicing.
Nutrition
- Serving Size: 1 slice (70g)
- Calories: 150
- Sugar: 0g
- Sodium: 210mg
- Fat: 2g
- Saturated Fat: 0g
- Unsaturated Fat: 1g
- Trans Fat: 0g
- Carbohydrates: 29g
- Fiber: 1g
- Protein: 5g
- Cholesterol: 0mg