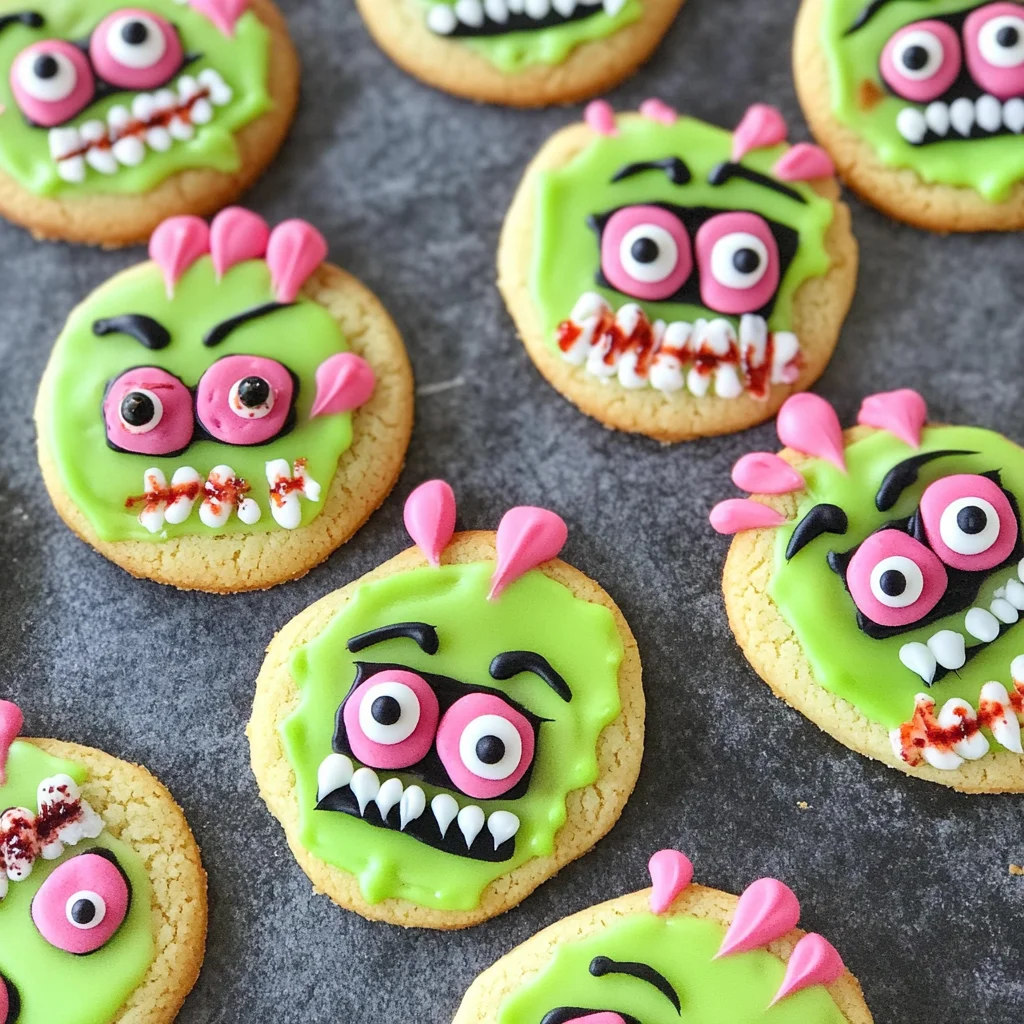
mini zombie cookies
If you’re looking for a fun and festive treat this Halloween, you’ve got to try making mini zombie cookies! These adorable little ghouls are not only a delight to eat but also bring a burst of creativity to your kitchen. I love how they can turn an ordinary afternoon into a spooky culinary adventure with kids or friends. Plus, they’re perfect for Halloween parties or just as a sweet surprise for your family.
The best part? Mini zombie cookies allow for plenty of room to get creative with colors and decorations. Each bite is sure to spread smiles, making them a favorite in our home during the spooky season!
Why You’ll Love This Recipe
- Super fun to decorate: Kids and adults alike will enjoy piping and creating their own zombie faces!
- Perfectly portioned: At about 2 inches each, these cookies are just the right size for satisfying that sweet tooth without overindulging.
- Make-ahead treats: You can bake and decorate these cookies ahead of time, freeing up your schedule on the big day.
- Whimsical appeal: Their unique design makes them an eye-catching addition to any Halloween spread.
- Easy cleanup: With royal icing as your decorating medium, there’s minimal fuss when it comes to cleanup!
Ingredients You’ll Need
These mini zombie cookies come together with simple ingredients that you might already have in your pantry! Here’s what you’ll need:
For the Cookies
- cookie dough
For the Royal Icing
- royal icing
- food coloring (Electric Green, Electric Pink, Red Red and Super Black)
For Decorating
- circle cookie cutter (2-inches)
- jumbo candy eyes
- red food coloring pen (optional if using these Halloween candy eyes)
- disposable decorating bags
- couplers
- decorating tips (sizes 2, 3, and 4)
Variations
This recipe is flexible, so don’t hesitate to mix things up! Here are some fun variations you can try:
- Change up the colors: Get creative with different food coloring shades—how about electric blue or vibrant purple for a spooky twist?
- Add flavors: Experiment with flavored extracts in your cookie dough like almond or vanilla for a delightful surprise.
- Try different shapes: Instead of circles, use other cookie cutters like bats or ghosts to keep things interesting!
- Incorporate sprinkles: Add some edible glitter or Halloween-themed sprinkles for extra flair on top of your zombies.
How to Make mini zombie cookies
Step 1: Prepare the Cookie Dough
Start by preparing your cookie dough according to your favorite recipe. Roll it out to about 1/4-inch thickness. This ensures that your cookies bake evenly and have just the right texture. Use a 2-inch circle cookie cutter to cut out shapes and bake them as directed. Once they’re golden brown, let them cool completely on a wire rack.
Step 2: Make the Royal Icing
While your cookies are cooling, prepare the royal icing. Divide it into smaller bowls; this way, you can tint each batch with different colors. I usually work with around 1/2 cup at a time. It’s important that the icing is thick enough to hold its shape when piped—this keeps those cute little details intact!
Step 3: Tint Your Icing
Now comes the fun part! Tint some of your icing light pink for brain details using just a drop or two. Then tint some green icing for the main part of your zombie cookies. Remember to add drops of water to thin it out slightly so you can pipe outlines easily but still fill in nicely later on.
Step 4: Prepare Your Decorating Bags
Fill two disposable decorating bags with size 2 tips containing black and red icing for facial features. Then use size 3 tip bags for green icing outlines and size 4 tip bags for pink icing brains. Secure tightly with rubber bands so they don’t leak while you decorate!
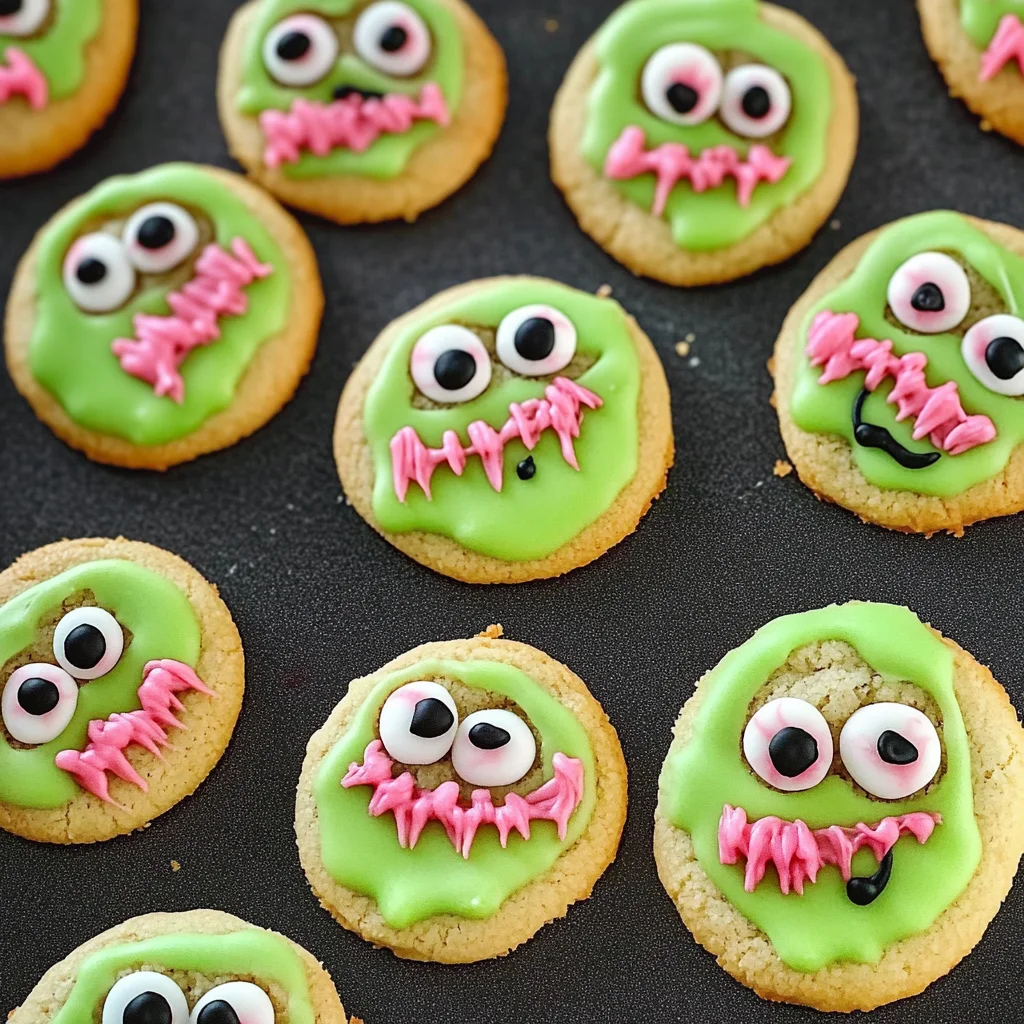
Step 5: Decorate Your Zombie Cookies
To begin decorating, outline each cookie (leaving the top open) with green icing. Let it set for about five minutes; this helps keep everything neat and tidy when filling in later. Next, pipe little brains at the top using pink icing before filling in the remainder of each cookie with green icing.
Step 6: Add Finishing Touches
After letting the filled cookies set briefly, place a jumbo candy eye on each one and gently press it down so it sticks well. Use black icing to pipe an X shape where an eye would go and add squiggles for mouths—don’t forget some red “blood” drips for that extra spooky effect!
And there you have it—your very own batch of delightful mini zombie cookies ready to impress! Enjoy every bite and share them generously because these treats are meant to be celebrated!
Pro Tips for Making mini zombie cookies
Making mini zombie cookies can be a spooky delight, and with these tips, you’ll ensure they turn out perfectly every time!
- Use chilled dough: Chilling your cookie dough helps maintain its shape while baking, preventing those adorable zombies from spreading too much into shapeless blobs.
- Piping consistency matters: Make sure your royal icing is the right thickness for piping. If it’s too runny, it won’t hold its shape; if it’s too thick, it will be hard to pipe. Aim for a toothpaste-like consistency to achieve the best results.
- Let layers dry between steps: Allow your icing to set for a few minutes before adding more details. This prevents colors from bleeding into each other and keeps your designs crisp and clean.
- Practice makes perfect: If you’re new to decorating cookies, practice on parchment paper before applying icing to the cookies. This will help build your confidence and fine-tune your piping skills.
- Get creative with colors: Don’t hesitate to mix food colors to create unique shades! Your zombies can have all sorts of quirky characteristics that make them extra fun for Halloween.
How to Serve mini zombie cookies
These mini zombie cookies are not only delicious but also a fantastic centerpiece for any Halloween gathering or party! Here are some fun ways to present them and make your spooky soirée even more festive.
Garnishes
- Sprinkles: Use green or black sprinkles to add an extra layer of texture and a playful touch on top of the icing.
- Edible glitter: A sprinkle of edible glitter can give your zombie cookies an eerie yet enchanting sparkle that will catch everyone’s eye.
Side Dishes
- Pumpkin Spice Muffins: These soft, spiced muffins are a seasonal favorite and pair wonderfully with the sweet flavors of your mini zombie cookies.
- Witch’s Brew Soup: A warming soup made from pureed greens like spinach or broccoli gives a fun twist to your Halloween theme while providing a healthy option.
- Ghoulish Fruit Skewers: Combine chunks of melon, grapes, and strawberries on skewers for a refreshing treat that balances out the sweetness of the cookies.
- Spooky Veggie Platter: Present colorful veggies like carrots, celery sticks, and bell peppers alongside a ghostly dip made from yogurt or hummus – perfect fuel for all those trick-or-treaters!
With these ideas in mind, you’ll have an unforgettable Halloween spread that delights both kids and adults alike! Enjoy making and sharing these frightfully fun mini zombie cookies!
Make Ahead and Storage
These mini zombie cookies are not only a festive treat, but they’re also perfect for meal prep! You can easily make them ahead of time for any Halloween celebration or just to enjoy throughout the week.
Storing Leftovers
- Store your decorated mini zombie cookies in an airtight container at room temperature.
- They will stay fresh for up to one week.
- If you live in a humid area, consider placing a piece of parchment paper between layers to prevent sticking.
Freezing
- To freeze your cookies, place them in a single layer on a baking sheet until fully frozen.
- Once frozen, transfer them to an airtight container or freezer bag.
- They can be stored in the freezer for up to three months.
Reheating
- If you prefer your cookies warm, let them thaw at room temperature before reheating.
- Heat them gently in the microwave for about 10-15 seconds.
- Enjoy them freshened up without losing their decorated charm!
FAQs
Here are some common questions you might have about making mini zombie cookies.
How do I make mini zombie cookies?
To make mini zombie cookies, follow the steps outlined in the recipe above. Prepare your cookie dough, cut out circles, bake, and then decorate with colorful icing and candy eyes!
Can I use different colors for my mini zombie cookies?
Absolutely! Feel free to get creative with colors when decorating your mini zombie cookies. You can customize them with any shades you like!
How long do mini zombie cookies last?
When stored properly in an airtight container at room temperature, mini zombie cookies will last about one week.
Can I freeze decorated mini zombie cookies?
Yes! You can freeze your decorated mini zombie cookies. Just ensure they are fully cooled and placed in an airtight container. They can last up to three months in the freezer.
What is the best way to store my decorated cookies?
The best way to store your decorated mini zombie cookies is in an airtight container at room temperature. If it’s humid where you live, consider separating layers with parchment paper.
Final Thoughts
I hope you enjoy making these delightful mini zombie cookies as much as I do! They add a fun and spooky touch to any Halloween gathering while being simple enough to create at home. Whether you’re hosting a party or just treating yourself, these little guys are sure to bring smiles all around. Happy baking!
Mini Zombie Cookies

Get ready to have a spooktacular time in the kitchen with these mini zombie cookies! These adorable bite-sized treats are perfect for Halloween celebrations and offer a delightful mix of creativity and fun. With their vibrant colors and whimsical designs, each cookie is sure to bring smiles to kids and adults alike. The best part? They’re easy to make ahead of time, allowing you to focus on enjoying the festivities. Gather your little ghouls for a memorable decorating session, and watch as they pipe creepy faces onto these green-iced delights. Whether you’re hosting a Halloween party or just looking for a sweet surprise for your family, mini zombie cookies will surely become a seasonal favorite!
- Prep Time: 20 minutes
- Cook Time: 10 minutes
- Total Time: 30 minutes
- Yield: Approximately 12 servings
- Category: Dessert
- Method: Baking
- Cuisine: American
Ingredients
- cookie dough
- royal icing
- food coloring (Electric Green, Electric Pink, Red Red, Super Black)
- jumbo candy eyes
- circle cookie cutter (2-inches)
- disposable decorating bags
- couplers
- decorating tips (sizes 2, 3, and 4)
Instructions
- Prepare your cookie dough and roll it out to about 1/4-inch thickness.
- Use a 2-inch circle cookie cutter to cut shapes and bake until golden brown. Cool completely.
- While cooling, prepare royal icing; divide into bowls and tint with desired colors.
- Fill piping bags with colored icing for decorating.
- Outline each cookie with green icing, fill in with more green icing after letting it set briefly.
- Add pink brain details and jumbo candy eyes; finish with black icing for facial features.
Nutrition
- Serving Size: 1 cookie (30g)
- Calories: 150
- Sugar: 12g
- Sodium: 50mg
- Fat: 5g
- Saturated Fat: 2g
- Unsaturated Fat: 3g
- Trans Fat: 0g
- Carbohydrates: 23g
- Fiber: 1g
- Protein: 2g
- Cholesterol: 10mg